DIY Tutorial: How to Strip and Prep Cloth Covered Cords for Wiring
Posted by Snake Head Vintage on May 29th 2019
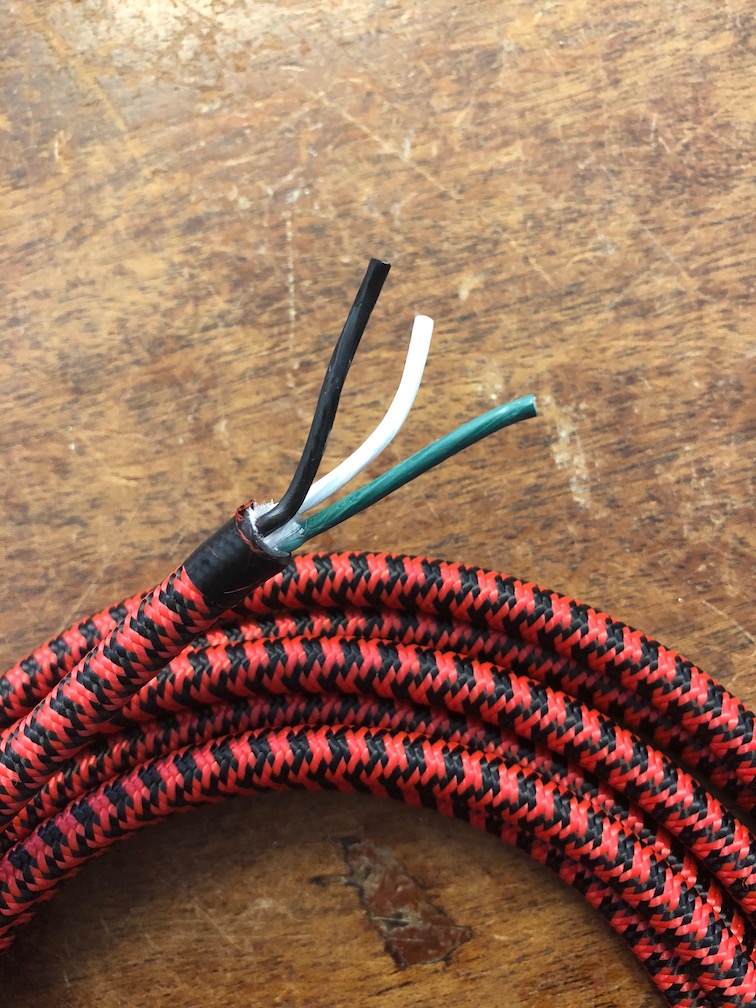
Working with cloth braided electrical cords
|

|
Tools needed or recommended:
|
Step by step: stripping and prepping cloth cord:
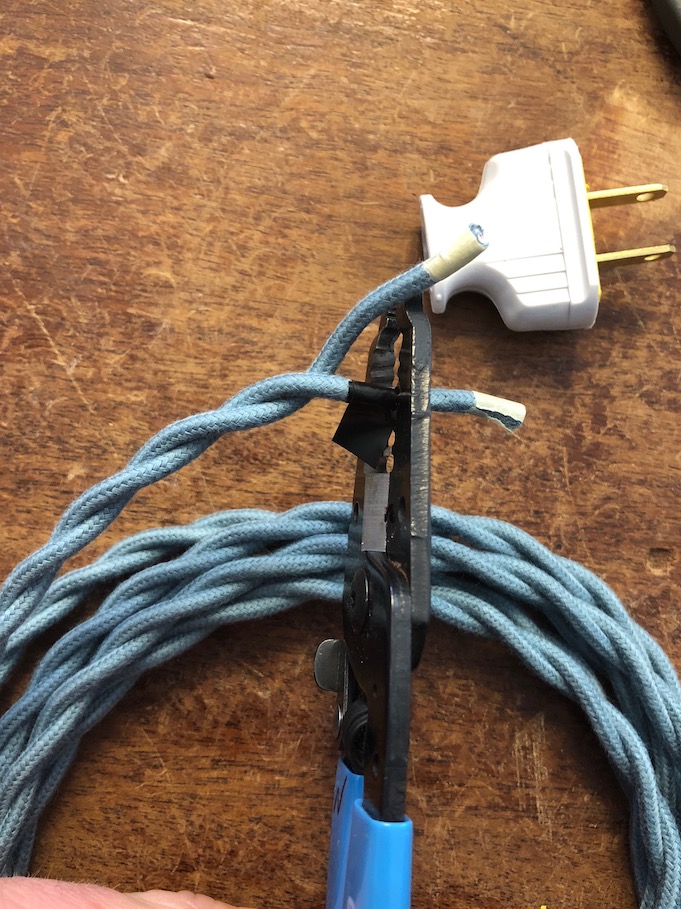
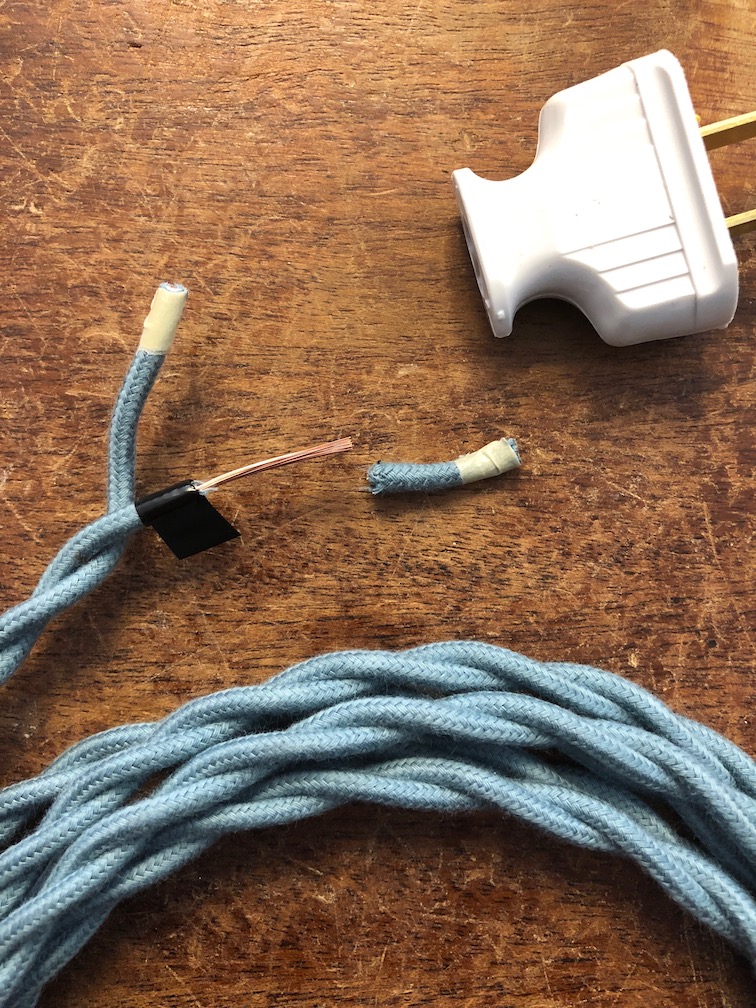
1) First, cut a piece of electrical tape about 1 to 1.5” long, then cut that in half long ways so you end up with two long skinny strips.
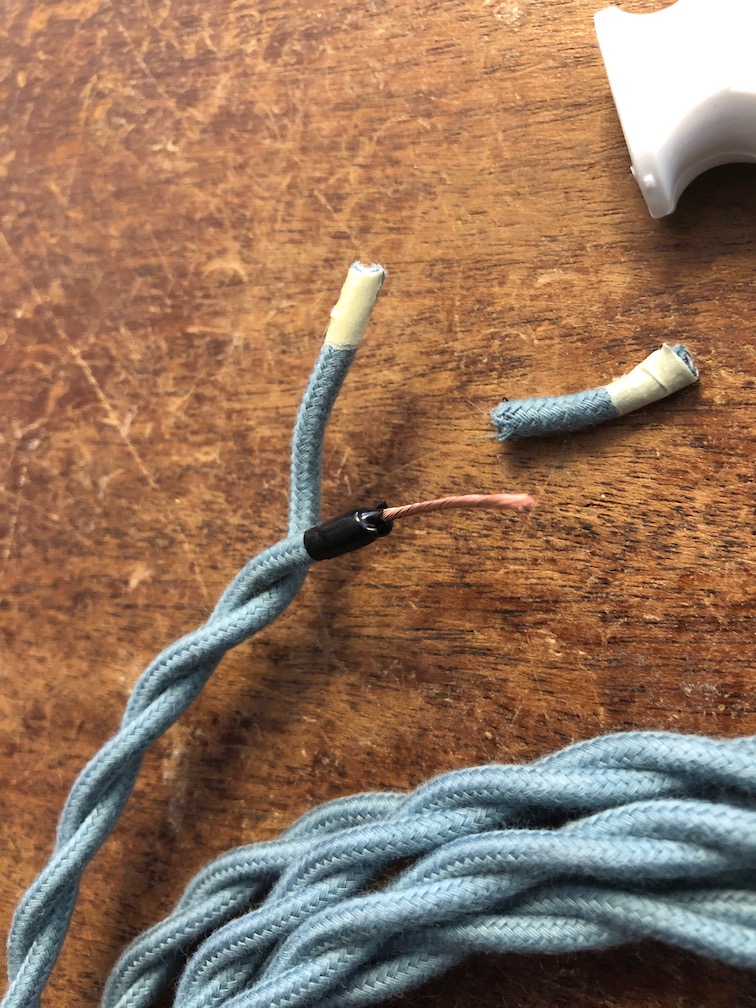
2) For twisted cord, wrap a piece of tape around each of the individual wires at the point you would like to expose the copper wire. You can then use your wire strippers to cut back the cloth and vinyl, all in one swift motion, bite right at the edge of your tape and pull off. This takes some practice (and if you end up breaking off too many of the copper strands, just cut back to where you were and try again), but after a few tries it becomes almost as easy as stripping regular cord. Now you can undo a little of your electrical tape and rewrap if up and around the area you stripped, making a king of tight wrap to hold everything together. Twist your copper strands together so they are tight and no strays, and you are ready to attach to something!
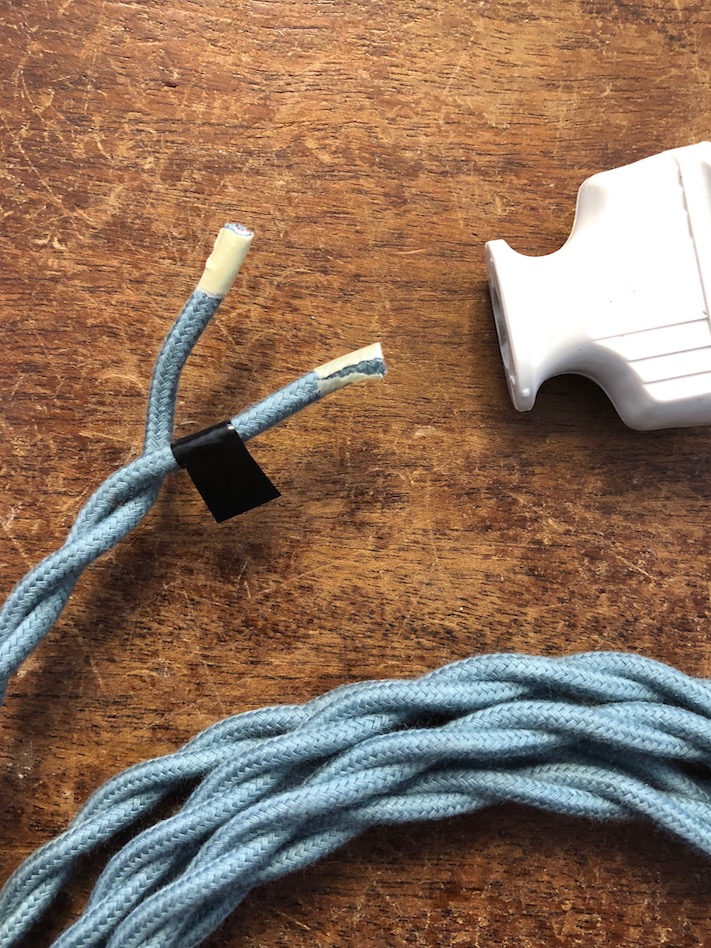
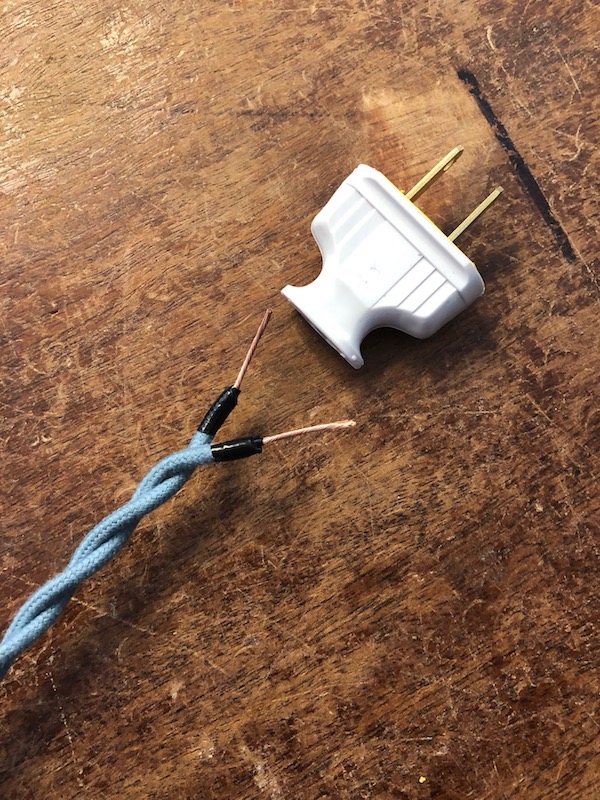
- Pro Tip: If you need to keep track of your hot and neutral, you can use a piece of white electrical tape on the neutral wire instead of black, or if you only have one color tape, mark it some other way so you remember!
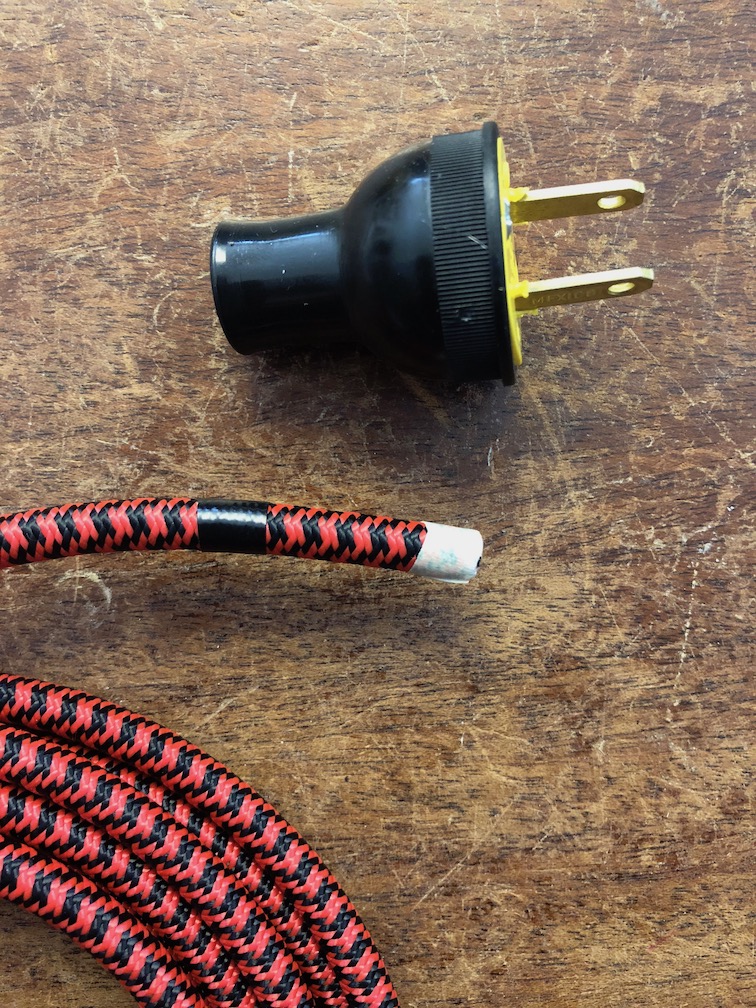
3) For round or parallel cord, wrap one piece at the point you want to strip (usually further down than twisted cord, because not only do you need to expose the copper but you need to give yourself enough length on each individual wire to make your connection), about 1.5”. For round cord, use your razor to make a light cut all the way around the cord, you want to cut through the cloth and score a little into the vinyl, but NOT CUT TOO DEEP INTO THE VINYL! The wires are in there underneath, and you don’t want to cut into them and expose the copper too far down. It might take a couple tries, but the goal is to cleanly cut the cloth and only score the vinyl, this will allow you to twist and pull the cloth and jacket right off, without putting any cuts into the wires below.
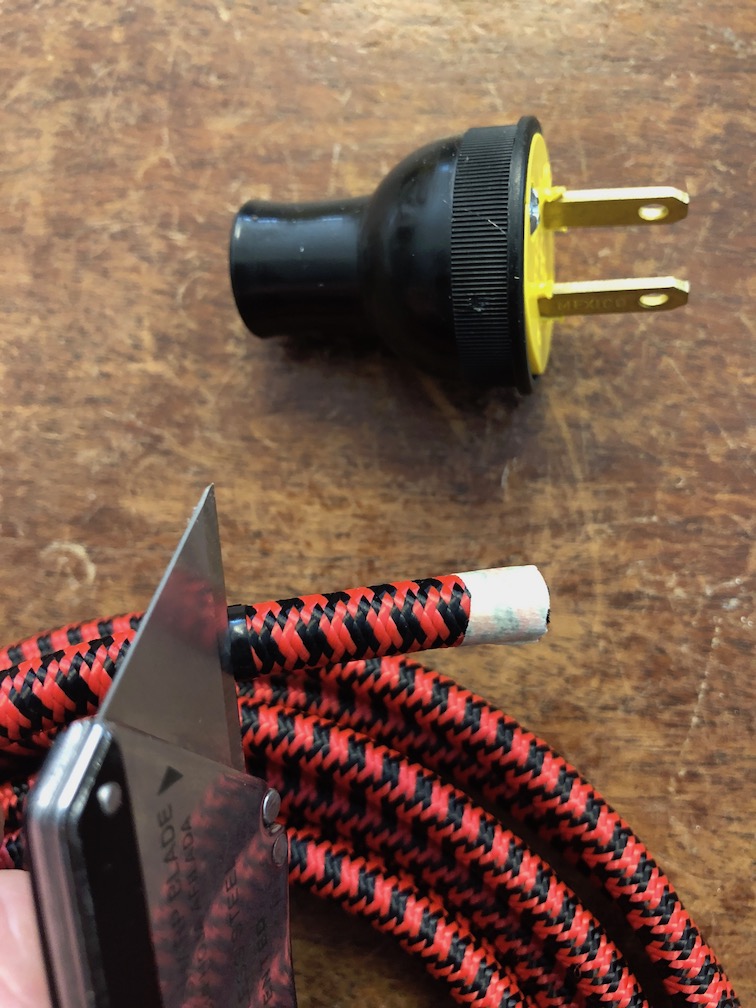
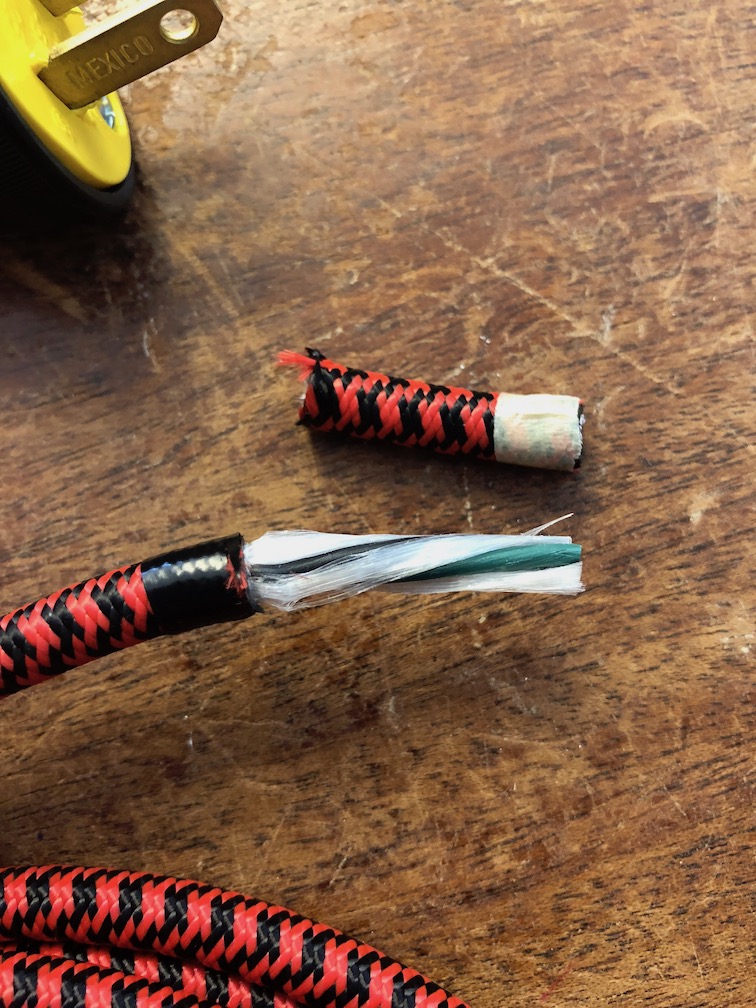
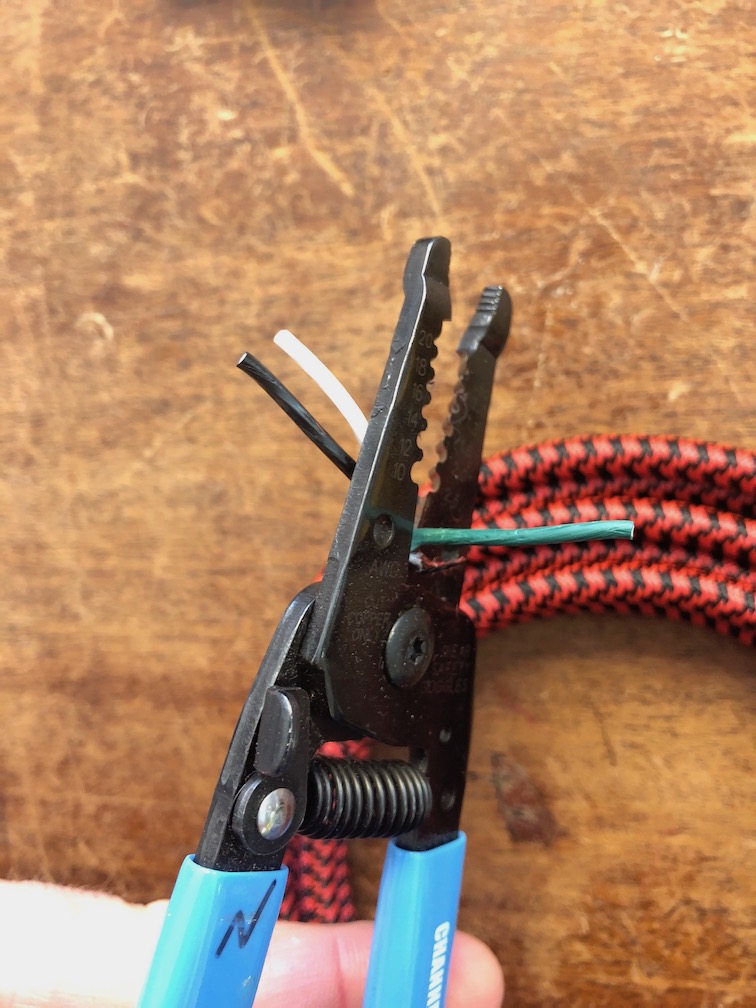
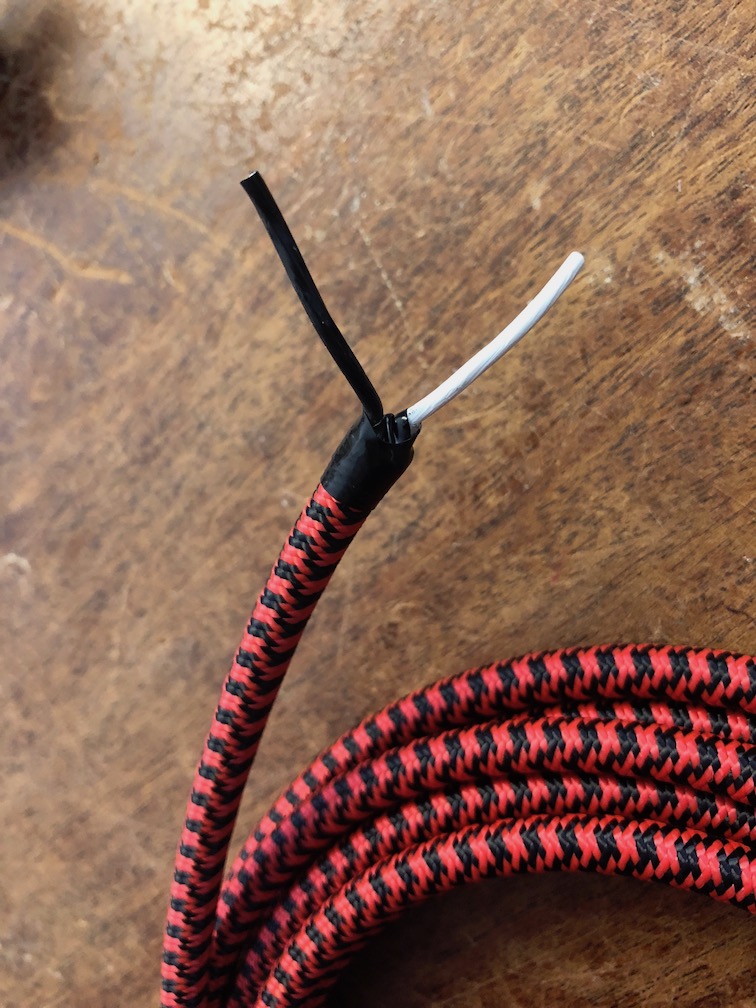
4) Once that is removed, cut off any inside packing material to leave you with just the wires exposed. If you don’t need the ground connection for your project, snip that off (green), and you’ll just have the black and white left. Take your second piece of tape and use that to wrap in between and around the wires, and onto the other piece of existing tape, to create a nice tight hold. You are now ready to strip the insulation off the wires, about ¾” to 1” down should do. Twist the copper and you’re ready to attach to a plug, socket, outlet, etc!

5) The only difference between round and parallel cord is that instead of scoring around the jacket, you only need to use your razor knife to split the two wires in half. Feel for the crease in the middle of the cord, and stab in with the knife at the edge of your tape and slide it down slowly to the end of the cord. Remove any remaining cloth with your scissor, and use your second piece of tape to wrap through and around to make a nice tight hold. Strip about ¾” to 1” down on each wire (the wire with the ridges on the side is the neutral, and the smooth wire is the hot), twist your copper strands together so there are no strays and you are ready to go!